

Your website may come pre-configured with a newsletter component called AcyMailing. This is a "getting started" tutorial and for more detailed information, please follow this link to their website.
First, you will need to sign in to the administration side of your website. Typically the address is www.yourwebsite.com/administrator. Once logged in to the admin control panel, mouse over "Components" and select "AcyMailing" (see figure below)

Depending on which version you have, the menu will look a little different. We have already setup and tested your newsletter and imported your users and/or other lists so you have someone to send your newsletter to.
A note on users:
The first icon or link is "Users." These are the people to whom your newsletter is going to be sent. Somewhere on your site, usually the front page, there's a module that will allow people to sign up for your newsletter. They input their name and a valid email address, and the system automatically puts them into your newsletter user que.
In the Users sections, you can delete unsubscribe and add new users manually by click on the "New" button in the upper left. When users decide they no longer want your email and click on the unsubscribe link (must be present in every newsletter you send) they will be taken to your site where they can unsubscribe. You must respect their decision and not manually re-add them in. Doing so would violate our SPAM policy and my result in your sites' removal.
To Create a New Newsletter
Click the "Newsletter" link. We have already setup a newsletter template for you (found under templates). If you have past newsletters you have sent, they will show up here, in the "Newsletters" section. Typically, you will want people to be able to see past newsletters, but if you don't, you can delete past newsletters here.
To send a new newsletter, click "New" in the upper right.

Your default newsletter template will automatically load. There are some tags we have already put inside your newsletter. Some of these tags automatically put in the user name, date and unsubscribe links. You will use the tag feature to include articles you have already written and have stored on your site. For more information on article management, review our Joomla Article tutorial.
In this tutorial, we are using an example from www.idahoriverfishing.com, an excellent fishing resource for Idaho and the surrounding states.
Adding Articles to your Newsletter
We suggest you organize your newsletter into descriptive headings so people can find information quickly. The intent of a newsletter is to remind everyone you're still offering your goods and services, and you are sharing information that is hopefully interesting and relevant to your audience. Hopefully, after reading the newsletter, they will click a link that will take them back to your site.
In thinking about your audience and newsletter marketing goals, you have several decisions to make. You can include the entire article, or just the first couple of paragraphs with a link back to your site. These first paragraphs are called "intro text." For more information on creating articles in the first place, click here for article management.
Inserting your first article
We have to insert a tag that will tell the system to insert your article. A tag is just a piece of code that is inserted into your newsletter that will be replaced by some type of content when it sends. Rather than copying and pasting text, you can insert article tags, save your newsletter, and go back to make changes in any of your articles; the text changes will automatically be updated when you send.
First, click your cursor in the edit window where you want your article to show up. Then click "Tags" up at the top. (See diagram below)
The Tags Selector
The next window to appear will be your Tags Selector. Each tab across the top will bring up options (tags) you can inset into your newsletter. The tab, "Subscription" will bring up tags that you can insert such as: user name, name, email. For this section, we just want to add an article, click on "Joomla Content." (see diagram below)
Article Insertion Choices
This next window allows you to make some choices in how your article will eventually appear. The first thing you will want to do is find your article. On the right, you will see a pull-down menu that defaults to "all." This shows ALL articles on your site. You can quickly filter out the section/category by opening this menu and picking the appropriate category. Or if you know your title, you can type the entire title or partial title into the "Filter" box on the left and press "Go." this will search your articles for whatever you just typed.
Once you have found your article, just click the title. Automatic code will be generated, and your selection will turn pale orange. (see diagram below)
All you need to do is decide if you want to show the Intro text or the full text. Intro text is all the text in an article before you press the "read more" button in the Joomla article manager edit window. You can also chose whether or not to show the author name or make the title clickable. If you chose this option, the article title will automatically take the reader back to your site to read that article on your website.
Once you've made all your selections, just click "Insert the tag."In this case, a small piece of code is automatically inserted into your newsletter edit window. (see diagram below)
Previewing your Newsletter
Admittedly, this code doesn't look like much. There's an easy way to see what this is going to look like, but first, if this is the first time you've set up this newsletter, you will need to do a couple of things.
- Give it a title. AcyMailing calls this "Subject" but really' it's the name the system will use to keep tabs on this newsletter. For your organization purposes, we recommend something simple like, March 2010 newsletter. Not exactly an exciting title, but it gets the job done.
- Eventually, you will need to assign your new newsletter to a user list, but for now, we recommend not assigning it to anything. This will help prevent you from accidentally sending an unfinished newsletter to your subscribers.
- Click "Apply" in the upper right. This will save the newsletter, but will not close the window.
Click the "Preview/Send button in the upper right.

This will update all the tags you've set inside your edit window and will preview the newsletter. (see diagram below) Note, however that all email clients, Thunderbird, Outlook, Gmail, Yahoo. etc. will display your newsletter differently. This preview only gives you an approximation of what the newsletter might look like. Usually, it's close enough.
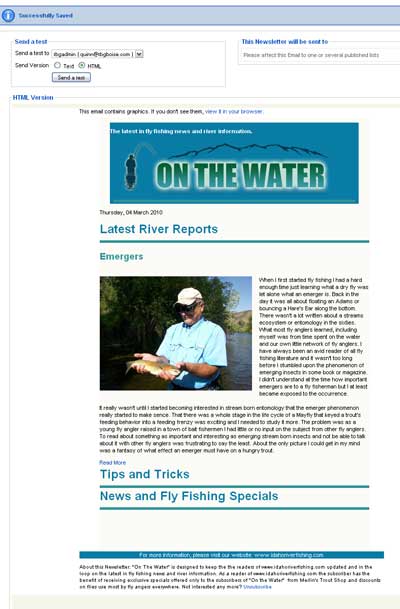
Sending a test to yourself:
To preview your newsletter more accurately, you can send a test to yourself. This will send a real newsletter to the email address associated with your Joomla User data. To do this, you need to be in the Preview window. If you're not, go to the "Newsletters" section and click on the name of the newsletter you want to send to yourself, and then click the "Preview/Send" button in the upper right.
In the upper left of the preview window, you will see "Send a test" section with your email address in the window (see image below). All you need to do is click the "Send a test" button. AcyMailing will instantly send this newsletter to your email address. Check your email. Your newsletter should be in your inbox.
This email address comes from your Joomla user data. If you want to change this address, you will need to go to the "User Manager" under "site" at the very top. You will see all the registered users and administrators for your site. Click your name and change your email in the edit window. Be sure to save your work.
Importing your Joomla Users into AcyMailing Lists
If you already have registered users on your site, you'll want to import them into your AcyMail user lists. The system keeps these lists separate, but it's easy to import your existing Joomla Users.
- Go to your AcyMailing control panel or navigation under "Components" and click "Users."
- Chances are, you will see all your users for multiple lists (if you have multiple lists). Over on the right, you'll a drop-down menu where you can filter the results based on which list you pick. In this panel you can add new users manually, or delete users. You can filter the names that appear on the page by choosing the list you want to view. (see image below) In this case, however, we don't any to do anything.

- To import your Joomla Users, just click the "import" button at the top.

- The next screen will allow you to select "Joomla Users" and select the correct list to import into. (see image below)
- Once you've made your selections. Click "Import" at the top.
- The next screen will show you the results. In this case, we added 39 more subscriptions and one email address was updated.
Sending your Finished Newsletter
Attaching a list:
You've inserted all your articles, previewed the newsletter, and it's ready to go. If your newsletter is not already open, open it up. Over on the right you will see some tabs (see below). If your list is not already attached, you'll need to do it now. Otherwise, your newsletter won't go anywhere. You can have several different types of newsletters and even multiple lists of users. Select the correct list. Just click the radio button to yes.
Sender information
Make sure you select the "sender Information" tab and update your email addresses.
Save your document by clicking Apply
Click Preview/Send button again. Note the menu has changed in the upper right. It now looks like the image below.

This is the final step. You've got the newsletter the way you want it; you've selected the appropriate list, you've previewed it, and now you're ready to send it. If you're sure, click "Send."
One last window will appear telling you how many users you will send it to. Click send and everyone will receive your newsletter.
Congratulations on your first newsletter! It takes far longer to read through this tutorial than to send a newsletter once you're familiar with how it works.